Well, today I was a little grumbly and not in the mood to do anything. But something ran across my mind despite my efforts to make the world stop spinning.
I have 3 monkeys boys who tear through this world with enthusiasm and little thought of what the end result might be. I say that because we go thru lots of toys, clothes, and equipment because of this reckless playful carefree curiosity. Often it is only the threat of punishment that keeps our home standing.
A problem created by these boys arose today during school time. I know it doesn’t seem like a big one but after continuous replacements, backups, or hiding something to protect it you grow weary of buying more. We were on our last dry eraser. My oldest uses them for math. He stands up because he is a boy and works out his math on a dry erase board next to his desk. We also have a large 8ft x 4ft dry erase board in our school room. The last eraser was being held together by duct tape. I haven’t seen the others in months.
So I hopped on Amazon to buy another one. Not pleased with the prices I saw (see extreme couponing to get an idea of my cheap side) I wondered what you used to make those expensive little fabricy styrofoam thingies. The answer was felt. Ok, so just felt? Was it magical or could it be any fluffy fabric? Hhhhhmmm……..I have some scraps of flannel.
Well, turns out it can be ANY fluffy fuzzy fabric. So if you are still reading, here is what I did in 20 minutes (minus the time I waited for my camera to charge, answer school questions, discipline the other two for fighting, and make lunch) and thanks for staying with me.
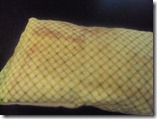
First, I used 4 in x 42 in strips of fabric (or width of the bolt of fabric). I used these because they were in my scrap basket from some baby quilts I did in December. I sewed right sides together the length of the fabric.
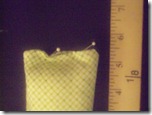
I then cut the strip into 6 in blocks, which gave me 6 – 3in x 6in blocks. Next I sewed one side on each block and flipped it right side out.


I think it works better than that darn eraser I bought for $6. And the bonus, they are totally washable. I can throw them in with the rags and towels. LOVE IT!
UPDATE:After using these little guys for a week I discovered they are the perfect size for a quick dusting. They did an amazing job on some neglected window blinds and can also be used as a quick pin cushion. My absolute awesome favorite part? I can throw them in the laundry with my dirty rags and they will only get fluffier. Score!!!! I am making more because it seems like I could use them more often and in more places and they didn't cost me anything. Wootwoot!!!
Linked up today over at Sew Darn Crafty, 5 Minutes For Mom, and Works for Me Wednesday!


I totally LOVE this idea! My kids are always abusing and losing that darn eraser. Excellent tackle! Visiting from 5MfM...thanks for sharing. Happy Tuesday!
ReplyDeletePS...LOVE this idea and decided to follow you because of it. Looking forward to reading your posts. :o)
What a great idea Kenna! We are constantly losing ours too! Thanks for posting it!
ReplyDeleteCute idea! Want to make some for my chalkboard table--we usually just use a damp rag.
ReplyDeleteGood tip to make several--I'm sure most of them will end up as beds & pillows for dolls.